
R Studio
Key Concepts
This chapter introduces RStudio, a Graphical User Interface (GUI) that makes it easier to use powerful features in R and manage large projects.
New vocabulary:
- Integrated Development Environment (IDE)
- RStudio Panes:
- Console
- Source
- Plots
- Viewer
- Environment
- History
- Workspace & Global Environment
What is RStudio?
Recall that R is both a language and an environment. RStudio is an Integrated Development Environment, or IDE, which is an enhanced, feature-rich programming environment with an easy-to-use graphical user interface, or GUI. While the base R environment is mostly text, RStudio has intuitive icons (hence, “graphical”) for point-and-click, automated operations.
RStudio’s layout is comprised of a menu, console, and a series of panes, or windows in the RStudio interface. Most panes are feature-rich and all panes serve a key purpose, but we’ll only focus on the most critical panes for getting started in RStudio.
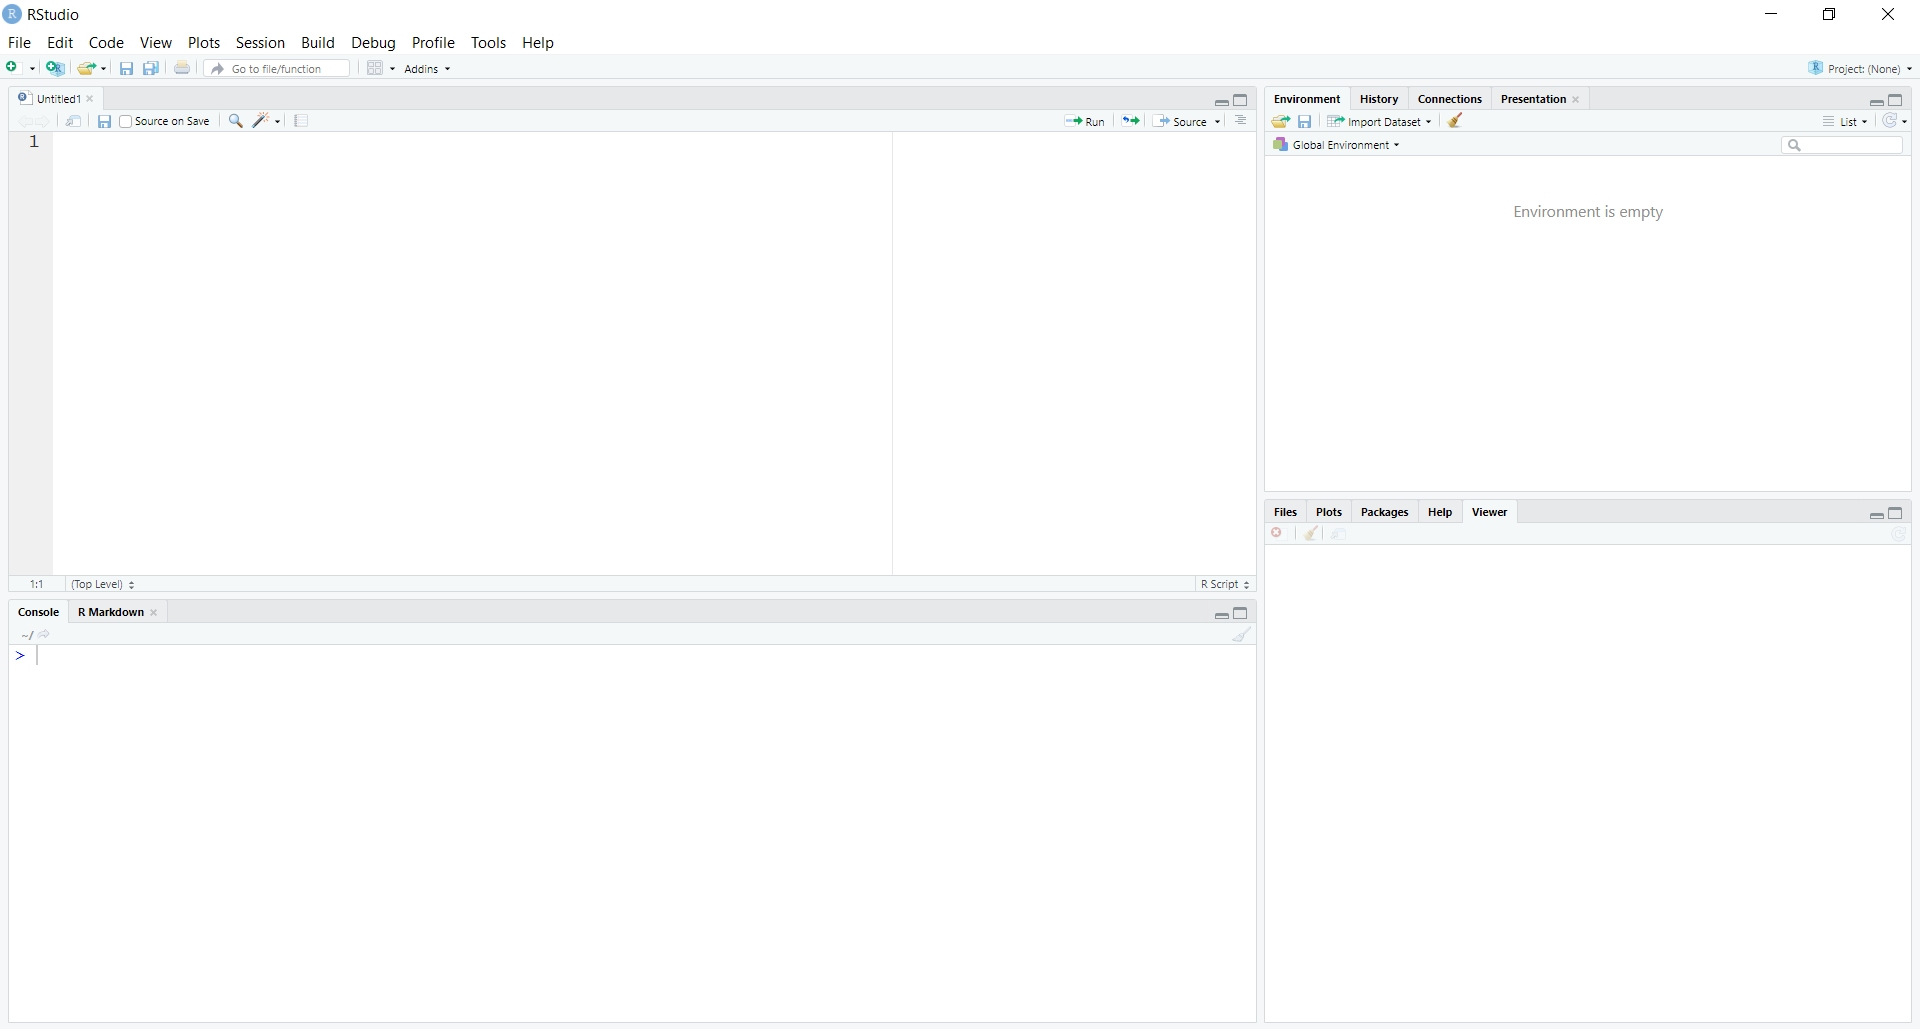
The RStudio environment with four open panes: The Source, Console, Environment, and Viewer panes.
Downloading & Installing RStudio
RStudio requires R 3.0.1+. If you don’t already have R, download it here.
RStudio is free, open source, and easy to install. Select the Desktop edition on their download page:
A Tour of RStudio
RStudio is comprised of a main menu and a series of panes, each with their own purpose and features. We focus on the following:
- Console Pane
- Source Pane
- Plots Pane
- Viewer Pane
- Environment Pane
- History Pane
The Console Pane
The console pane is where R expressions are evaluated. In other words, this is where your code is executed. Recall that working in-console is also known as working interactively and, typically, working in-console is more often for “quick and dirty” tasks, like printing contents of your working directory.
The Console Pane
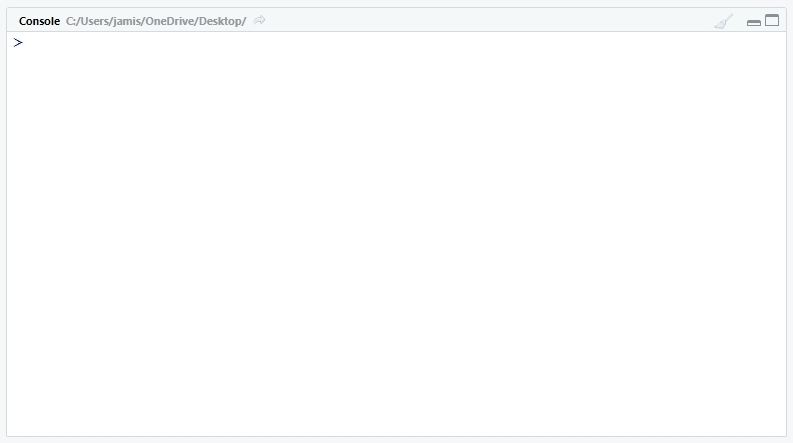
The console is where code is executed and is typically used for “quick and dirty” tasks.
The console panel lists your current working directory. Notably, even when using point-and-click mechanics to, e.g. import data or change directories, the code for such tasks will still execute in the console. Such click-to-code operations are called macros.
Pro Tip: When writing a script, especially when writing out new directory paths, it’s sometimes quicker to use use a click-to-code operation and simply copy and paste the macro code from the console to your script.
The Source Pane
The source pane contains any opened scripts. In starting a new R session, this pane isn’t visible until you’ve opened a new or preexisting script. Multiple scripts may be opened at one time and are navigable using tabs along the top of the source pane.
The Source Pane
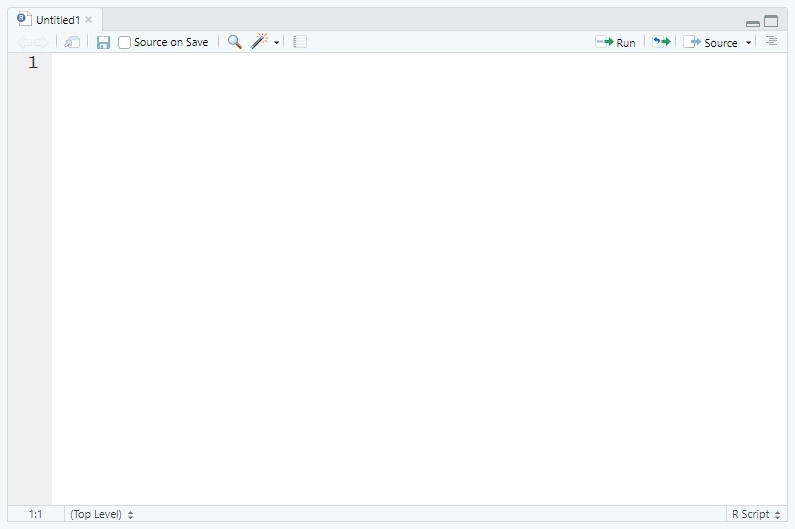
The source pane contains opened scripts. It won’t appear until you’ve opened at least one.
Depending on the type of script, e.g. plain text scripts (.R), publications (.Rmd), presentations (.Rpres), and apps, each script provides different options in the pane’s toolbar. Common options include:
- Show in New Window: Open the script in a separate window; valuable for two or more monitors
- Save Current Document: Update an existing script or title and save a new script
- Find/Replace: Both conventional and advanced options to find and replace code
- Run: Run the line of code where the cursor is, or multiple lines if highlighted
- Show Document Outline: View (and jump to) script’s table of contents
Plots, Viewer, & Help Panes
The Plots, Viewer, and Help panes are used to viewing data visualizations, HTML output, and helpful documentation.
The Plots Pane
The Plots pane allows users to view, export, and publish non-interactive data visualizations. R uses the built-in graphics package by default, but a variety of packages exist such as lattice and ggplot2. While the output displayed is not interactive, it is responsive, i.e it will re-render its scales appropriately if you change the height or width of a plot. Notably, the “Zoom” option opens visualizations in a new window, while the “Export” option allows you to save the image with user-defined dimensions and in a variety of formats.
The Viewer Pane
The Viewer pane renders interactive graphics in HTML with the same options as the Plots pane. Brevity aside, it’s awesome.
The Plots & Viewer Panes

The Plots and Viewer panes visualize non-interactive and interactive graphics, respectively.
The Help Pane
The Help pane is one of the most valuable panes for any R user. By calling function help() with a dataset, package, or bare function name (i.e. a function name without ()), its documentation, if available, appears here.
Note: Unless you’re using external data or custom functions, there’s almost always documentation. Whether it’s the unit of measurement for a variable in a dataset or the limits you can specify for a function argument, this little nook in RStudio is invaluable to new and advanced users, alike.
Pro Tip: Instead of the help() function, you can use the ? function before an object name, e.g. ?install.packages.
The Help Pane
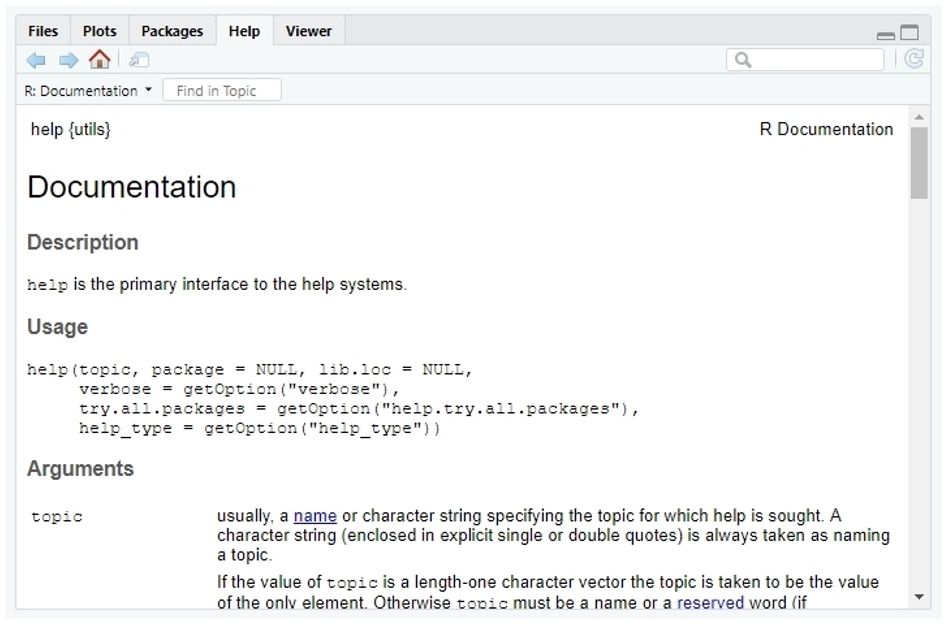
The invaluable Help pane displays documentation for packages, functions, and datasets.
The Environment and History Panes
The Environment and History panes display the objects in your environment and the history of your in-console commands.
The Environment Pane
Again, R is both a language and an environment. The Environment pane displays objects that are stored within your session’s workspace, or global environment, which must be recreated or reloaded with each new session. Note the following options:
- Environment: Opens a dropdown menu to select different environments, e.g. package environments
- Load Workspace: Opens a file explorer to load previously saved workspaces and their objects
- Import Datasets: Opens a dropdown menu to read in datasets that you can store in objects
- Clear Objects from Workspace: Removes all objects stored in the global environment
The Environment Pane

The environment pane displays any objects you’ve imported, loaded, or stored in your global environment.
The History Pane
The History pane documents every command you’ve executed in your session. When you select a line, you can paste it directly into the console pane with “To Console” or directly into the source pane with “To Source”.
The History Pane
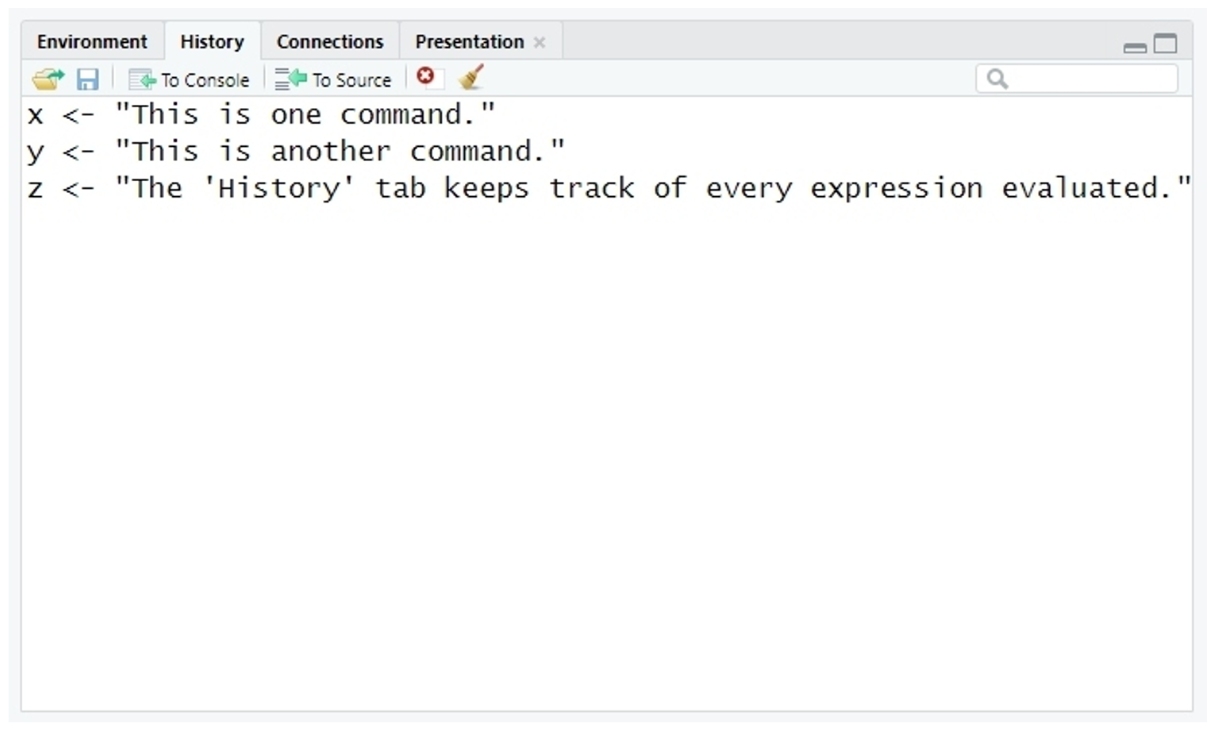
The history pane records every command you’ve run in your session.
Customizing Your Pane Layout
In RStudio, you can customize both where panes are displayed as well as which panes to show by default.
Layouts for Beginners: Taking Great Panes
Panes cannot be removed entirely from the RStudio interface, you but can shuffle them by order of importance. Click the “Tools” dropdown in themenu, “Global Options…”, and “Pane Layout”. We recommend focusing on those discussed in this chapter.
Customizing Pane Layout
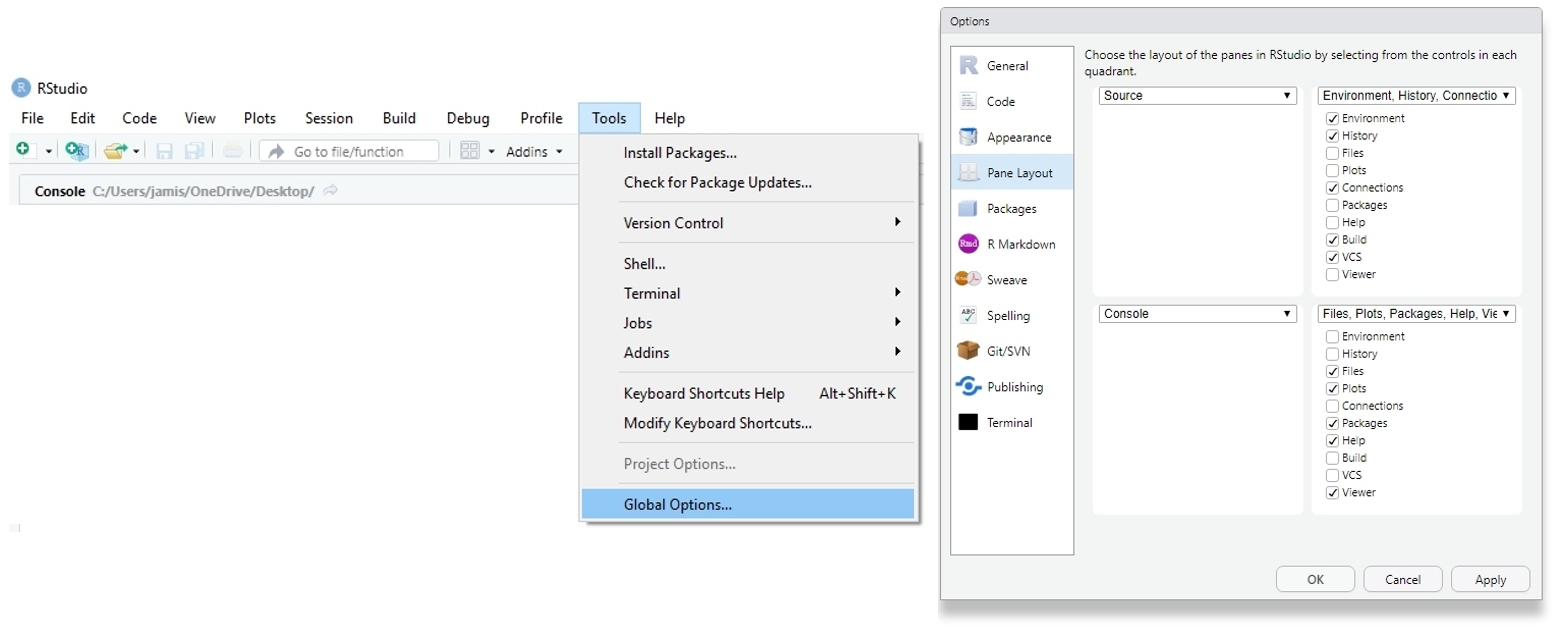
You can customize which panes appear, and where, in Global Options’ Pane Layout.
Less Important Panes, or Panes in the Rear
There are a couple of panes worth mentioning for new users. However, they are seldom used by advanced users:
- Files: Set working directories and create, copy, rename, and delete folders
- Packages: Install, load, update, unload, and uninstall added (“User Library”) and built-in (“System Library”) packages
Pro Tip: You probably won’t use these panes often. One of the benefits of scripted languages is that they can be reproduced by other users. As a rule, since much of your work will require loading packages, you should include the library() function with script-dependent packages at the start of every work. The same applies to working directories with the setwd() function.
Expanding to Fullscreen: Focus on the Pane
If you want to expand a pane, or “zoom”, to fullscreen mode, select “View” in the RStudio menu and “Panes”.
Toggling Fullscreen Panes
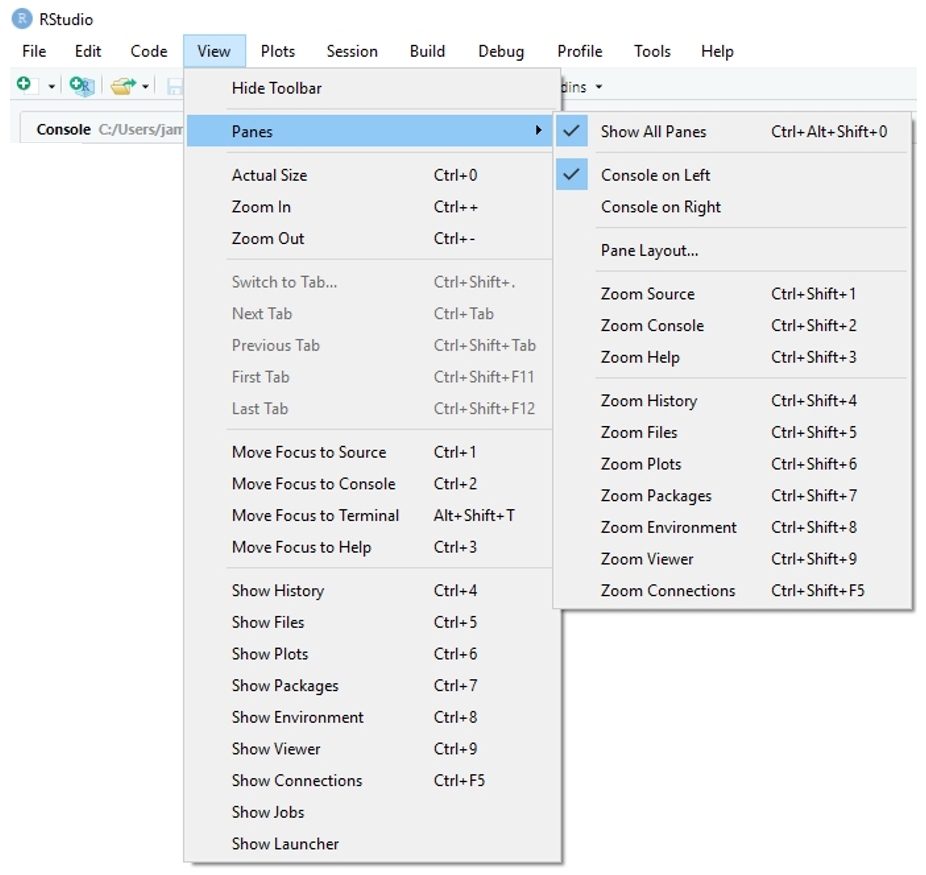
You can expand any pane to fullscreen mode in the “View” dropdown of the RStudio menu.
Global Options: Aesthetic & Functional Preferences
Global options are accessed in the “Tools” submenu and allow users to modify their RStudio interface in myriad ways, both aesthetically and functionally. We recommend new users experiment with these options and visit a few notable modifications.
Accessing Global Options
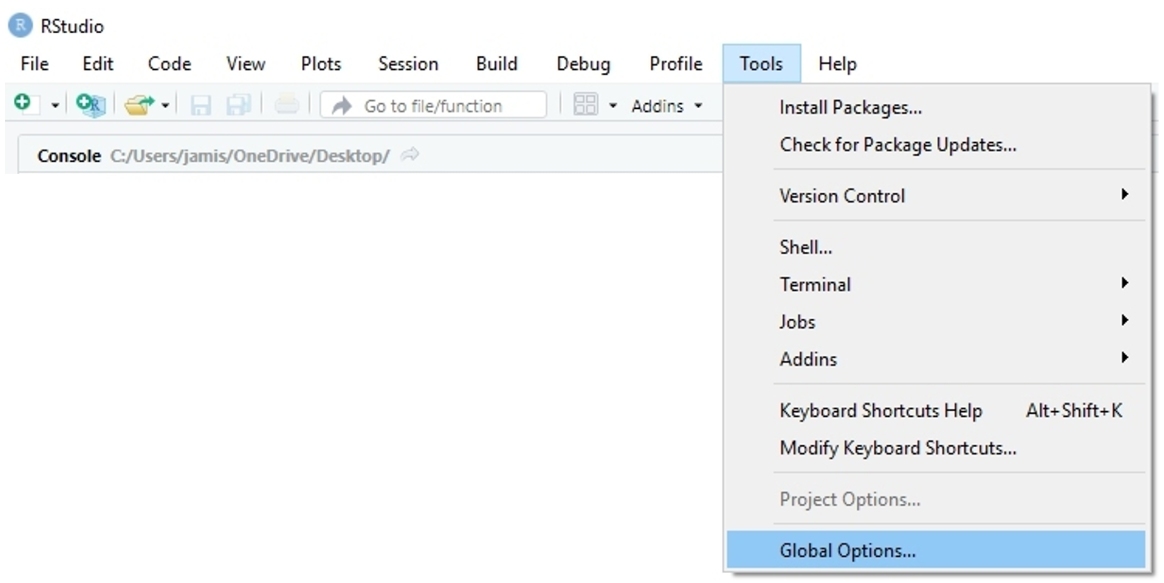
Access “Global Options” in the “Tools” submenu.
Code: Autoformatting & Behavior
The “Code” section affects the way R automatically formats your code and how you choose to write and run it. It has sensible defaults, many of which you may not be prepared to appreciate quite yet. For now, consider the following:
- Indentating: In the “Editing” tab, consider a “tab width” that works best for you. When indenting, would you prefer two characters (i.e. spaces), or four? The former allows more compact code. The latter allows for more intepretable code.
- Guide Margin: In the “Display” tab, consider applying a “margin column” of 80 or 100 characters (i.e. spaces). This creates a subtle guide in your scripts that helps keep code concise and readable. Even basic code within basic code can create, what RStudio’s Chief Scientist Hadley Wickham refers to as, “Dagwood sandwich” code.
Appearance: Express Yourself Intepretably
The Appearance section allow you to customize the size, font, and color of your text as well as the “theme” colors of your RStudio interface. Here, “theme” is both functional and aesthetic. For example, darker themes are more conducive to night owls. For all themes, certain syntax uses different colors to make your code more interpretable - keep this in mind for each theme!
Notable Global Options: Code & Appearance
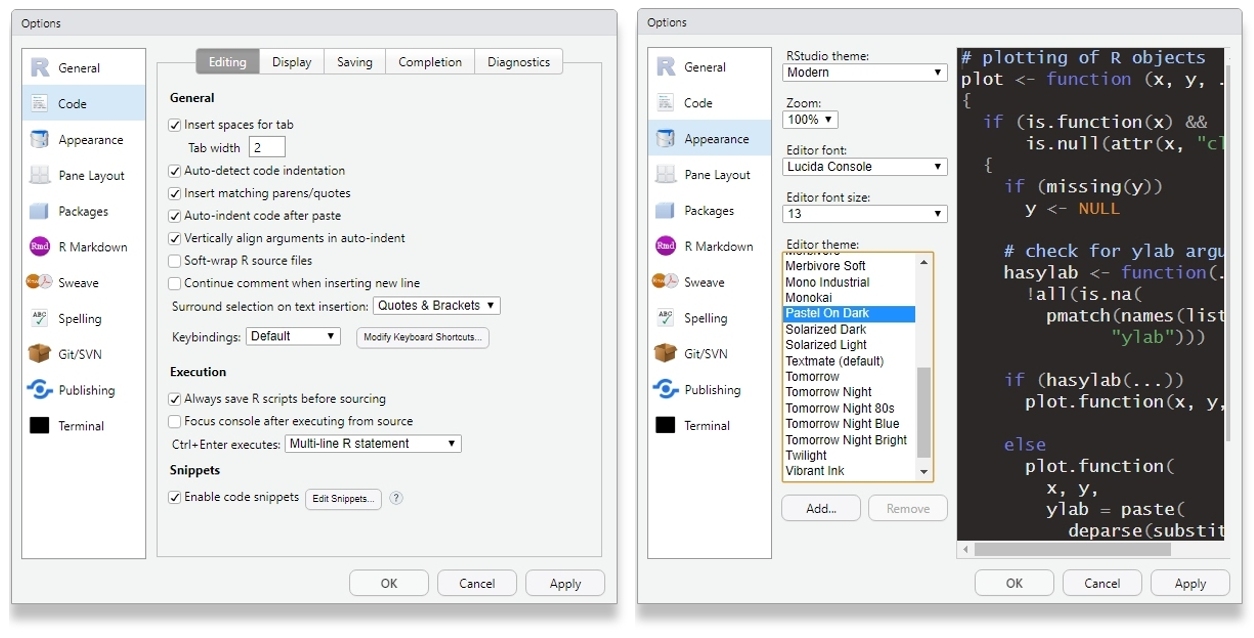
Global options allow you to set preferences that can significantly impact your experience with RStudio.
Further Resources
The following resources are helpful in learning more about RStudio and coding conventions:
I) Full Introductions to RStudio
- “What are R and RStudio?” (Ismay & Kim, 2019)
- “Intro to R: Nuts & Bolts” (Crawford, 2018)
II) About RStudio
- RStudio Homepage (RStudio, 2019)
- RStudio About Page (RStudio, 2019)
- RStudio Product Page (RStudio, 2019)
III) Conventions
- “The State of Naming Conventions in R” (Baath, 2012)
